
- You are here:
-
MTBC Home

-
Mountain Biking Blog
-
General
- Making Your Own Mountain Bike Videos
Making Your Own Mountain Bike Videos

But what if you want to make our own mountain biking videos? What is the best way to go about it? And how hard will it be to make something that someone will want to watch? It's not too difficult to make a decent mountain bike video as long as you are willing to invest in a camera or cameras, some video editing software and most importantly some time to put it all together.
First you will need to get an appropriate camera suited for filming mountain biking. There are a few models out there with GoPro and Contour having the upper hand on the market. These cameras offer HD quality footage while providing many ways to mount the camera on your bike or on your helmet. In general expect to pay $200-$400 for one of these cameras. You can also pick one up used online if you look around.
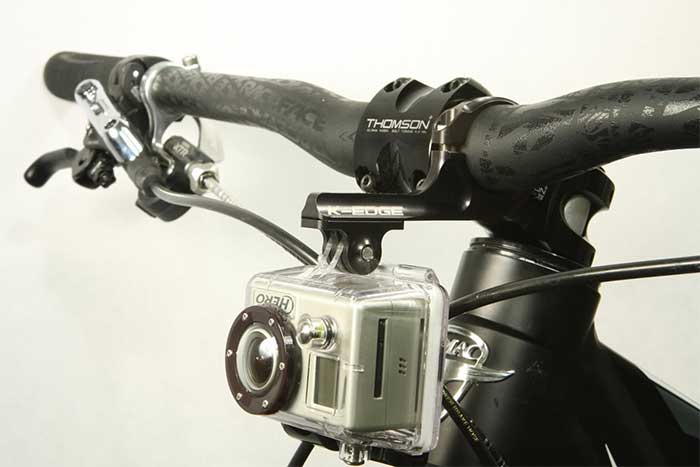
You will also need to decide how you want to mount the camera to get the angle that will work best for your riding style and the trails you will be riding on. There are many places you can mount these cameras such as the handlebars, behind the seat, on your helmet, on your chest and so on. If you plan on riding with other riders then you can place the camera in a spot where you can get them in the video as well. Certain angles will give you different results as well. For example the handlebar angle will appear faster than the chest or helmet cam. And the chest cam angle is better for technical terrain and jumps since it shows the roughness of the trail. The behind the seat rear angle is great for when you have someone riding close to you at high speeds. If you have multiple cameras then you can edit the footage to show different angles of the trail to provide some variety. The camera manufacturers will make mounts for their camera but there are also third party mount makers like K-Edge that make high quality mounts.
Once you have your footage now you get to edit it and make your blockbuster hit. One thing to keep in mind is that you don't want to use the super boring stuff like uphill climbs unless you are planning on stressing the steepness of the trail. Most people like watching the faster downhill sections since they offer the most action and will tend to keep their attention longer. If the trail is not too exciting you may want to show small clips of various sections to give the viewer an idea of what the whole trial is like rather than making an hour long video containing every foot of the trail.
If you want to spend the money you can get some professional video editing software such as Adobe Premiere, Final Cut or Sony Vegas. If you don’t want to spend the money then there are free or cheap products available such as Windows Movie Maker which still does a decent job and allows you to add things such as effects and so on. Then of course you will have to learn how to use the software which can take some time. Many people will just upload their unedited footage which doesn't make for a good movie since nobody wants to see you putting on your helmet and checking the air in your tires.
If you want to add a little more pizazz to your video then you can add some music to it since sometimes it will make the video seem more exciting than it really is depending on the song. Just make sure if you plan on monetizing your video through YouTube etc. that you don't use copywrited musicor else they won't let you make any money off of advertising. Another thing you may want to try and do is add a splash screen with the trail name and info at the starting and maybe some transition effects between scenes to make it look a little more professional.
After your video is complete you can decide where you want to upload it based on what kind of audience you are looking for. Obviously YouTube will be the most common place but there are other options like Vimeo or even PinkBike which is more specific to mountain biking. After you get it uploaded you can share the video link with your friends rather than trying to send some huge video file via email and
Posted by Mike Treiber